

There is more to installing a press than rolling it into a space. A bit of planning and gathering of supplies will make your installation easier in the short run and printing more efficient and enjoyable in the long run. While this article deals with presses specifically, keep in mind the other equipment requirements around the press as well—ink slab, work counters, a composing surface, etc. are all competing for precious floorspace.
Table Top Presses
Smaller table top presses are fairly easy—a sturdy counter or table and you’ve got half the battle won. Keep in mind counter height—if you’re very tall or very short you may need to make adjustments to put the press at a comfortable working height. You should be able to stand naturally erect when operating and feeding the press. Even small presses need to be level—both front to back and side to side. Smaller presses also want to be secured to the work surface to keep them from creeping in use. If you can’t bolt to your work surface, then bolt the press to a board and clamp that board to the work surface. Use fasteners and washers that are sized for the press—a Hohner Model D weighs a lot more than a Kelsy 3×5, and therefore needs larger fasteners. If it’s completely unworkable to fasten the press to the counter/table, you can also use a sticky rubber mat of the sort used to line drawers and keep things from sliding.
Floor Model Presses
As the press gets larger, the installation becomes more complex. First, think about the location in the room—do you need power? Where is the power? You can run power overhead and drop it down to a press or run it on the floor, properly covered to avoid tripping hazards and damage. Consider making the press a plug-in device rather than hard wired—this often makes any electrical inspections easier. If you don’t know about electricity, DON’T MESS WITH IT! A simple press installation should only take a couple of hours of an electrician’s time, which amounts to cheap insurance. A motor driven press should have its off/on switch where the operator can reach it when standing at the press.

Second, think about clearance around the press—most presses require access from all sides, especially the back, to oil them and do other routine maintenance. Folks who lay out factories prefer at least three feet of clear space around any equipment for this purpose. While a luxury in most small shops, this is not a bad figure to shoot for. Don’t make it hard to oil your press—you and your press will regret it in the long run. Also think about access for getting the chase in and out of the press.
Next, the floor—ideally your new acquisition will be landing on a nice level, smooth, sealed concrete floor. In the real world this is unlikely. Most floors settle over time and aren’t level (garage floors intentionally so—they slope toward the garage door). On large machines leveling is doubly important. Older oil-hole bearings are designed to have oil flow through them—if they’re off level the oil doesn’t move properly. Also an un-level press will put uneven stress on the bearings, causing wear. (Speaking of oil—presses drip oil—depending on your tolerance of oil on the floor, you may want to put a drip pan under your press. On a wood floor this is a requirement.)
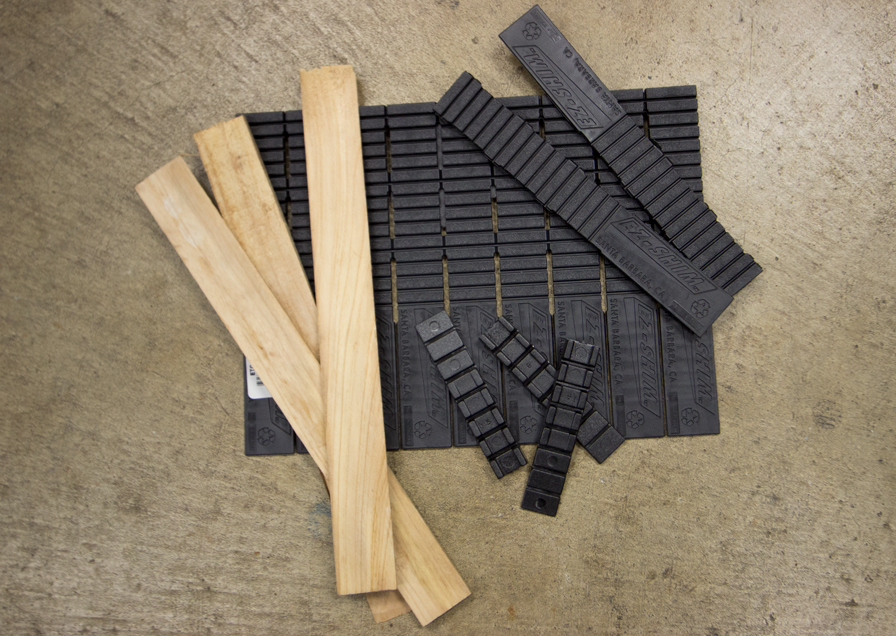
Finding a good place on the press to measure level can be kind of challenging, especially for front to back level. On a platen press, for side to side level (which is more critical) the best place is the platen itself. For front to back level on a platen press, put the level on the feed or receiver board. For cylinder presses, put the level on the press bed in both directions. Next step is to level the press using shims—you can use wooden door shims, but there are hard plastic ones that are highly preferred. Get these at the local lumberyard or home center. When doing the leveling, one of the four corners or feet of the press should stay on the floor. Cut the tails off the shims off when you’re done so you don’t kick them out when you’re working around the press.

If you have a wooden floor more care is needed—virtually any concrete floor that isn’t falling apart will support most letterpress equipment being used today. Not so wood floors. Often older buildings are over-built, which is a good thing is this case, and you may not need extra structure. If you have any question about the load bearing capability of your floor, there are a couple of things you can do—put the press on 4×8 sheet of plywood, preferably 1 1/8″ thick underlayment. This will spread the load over several floor joists. If you can get under the floor, simple posts and beams can provide extra strength as well. Make sure the posts are on post bases or concrete—they will rot if you put them into soil. As always, if you feel like you’re over your head, talk to your friends and colleagues to get some opinions and advice.
Many printers will leave their presses on skids, which is a fine option. The same concerns apply regarding leveling—level the press with shims under the skids. Use enough shims to cover the full width of the skid. The downside of leaving your press on a skid for the final installation is that it may not be at the best working height. This is especially true of treadle driven presses. You can build a platform to stand on if need be, but make sure it’s large enough that you won’t inadvertently step off it and hurt yourself.


